
Australia’s deserts aren’t just vast, dry stretches of sand, they’re places of soul-stirring beauty, ancient stories, and unforgettable adventures. I’ve been lucky enough to traverse some of these iconic landscapes, and each one has left a lasting impression. Here are my top five desert adventures, from the mighty Simpson to the raw, remote vastness of the Great Victoria Desert.
1. Simpson Desert – Following the Madigan Line
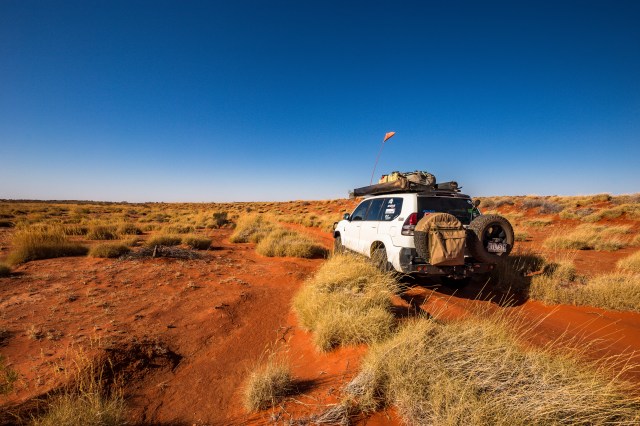
Forget the French Line — if you’re chasing a real desert adventure, the Madigan Line is the one to beat. Named after explorer Cecil Madigan, who crossed this route in 1939 with camels and a scientific party, the Madigan Line is the most remote way to cross the Simpson Desert and follows a series of marked campsites from east to west.
Starting just north of Old Andado Station, the track snakes west across the desert towards Mt Dare, traversing vast dune fields, swales, and spinifex-covered plains. It’s a slow and challenging crossing, and on some days, we barely made 50 kilometres, but the sense of solitude and connection to the land is unmatched.
Trip Tip:
Permits are required from the Aboriginal Land Councils and the Northern Territory Government. You’ll need a high-clearance 4WD, GPS mapping, and full self-sufficiency.
2. Great Sandy Desert – Across the Nyangamarta Highway
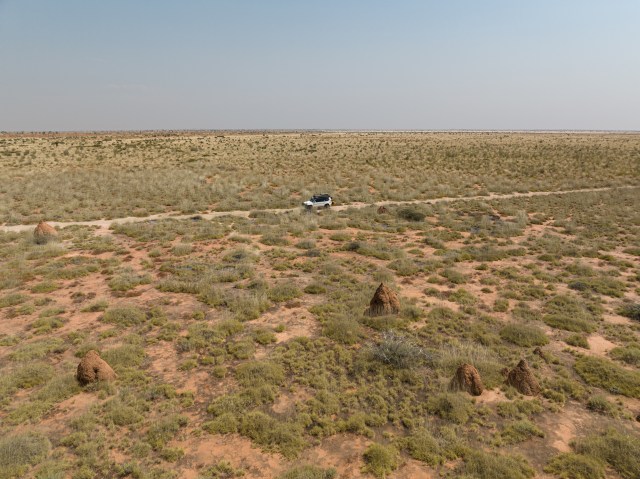
The Nyangamarta Highway, formerly known as the Kidson Track, is a raw, remote route stretching over 600km through the western fringes of the Great Sandy Desert. Created in the late 1960s, this track begins near Sandfire Roadhouse and runs east toward Well 33 on the Canning Stock Route, carving through some of the most untouched country in Western Australia.
Crossing Nyangumarta country, this journey is about more than just ruts, dunes, and spinifex plains — it’s about respect. The track passes several sacred sites where photography is not permitted; travellers are urged to tread lightly and observe local cultural protocols. Two designated campsites are available on the western half of the route, offering safe and respectful places to stop and soak in the desert’s silence.
This is a truly isolated track with long, soft sandy stretches, occasional corrugations, and a deep sense of wildness. I didn’t pass another vehicle for days — and that’s part of the magic.
Trip Tip:
A permit is required from the Nyangumarta Warrarn Aboriginal Corporation. Carry ample water, fuel, recovery gear, and travel in convoy if possible. This is serious country — remote, sacred, and absolutely unforgettable.
3. Little Desert – Where the Bush Meets the Sands
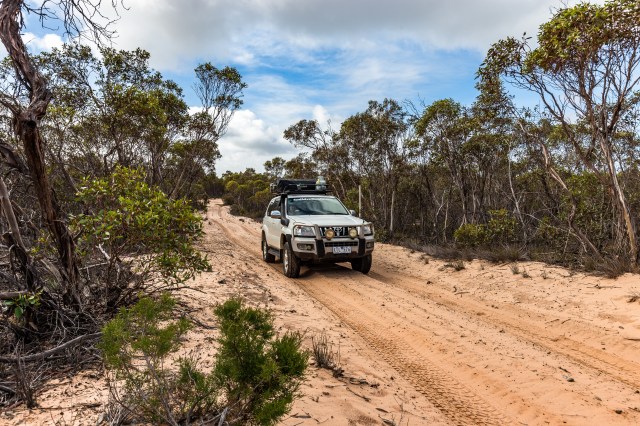
The Little Desert in western Victoria is a unique blend of sandy desert terrain and rich biodiversity. I explored this gem in spring, and the contrast between desert sands, banksia woodlands, and wildflowers was remarkable.
It’s ideal for beginner off-roaders or anyone wanting a taste of desert adventure closer to civilisation. Wildlife is abundant, from shingleback lizards to mallee fowl.
Trip Tip:
Set up camp at Kiata campground for easy access to 4WD tracks. A great entry point for those new to desert driving.
4. Great Victoria Desert – Along the Anne Beadell Highway

Spanning over 700km, the Anne Beadell Highway is a true test of endurance and remote travel. Built by legendary surveyor Len Beadell and named after his wife, this track runs between Coober Pedy (SA) and Laverton (WA), cutting right through the heart of the Great Victoria Desert.
This track is rough, slow-going, and rarely travelled, perfect for those seeking raw adventure. Along the way, you’ll encounter wild camels, salt lakes, old military relics, and silence so thick it hums.
Trip Tip:
You’ll need multiple permits to cross Aboriginal lands, and fuel logistics must be carefully planned. Travel prepared, travel slow, and let the desert show you its secrets.
5. Gibson Desert – Along the Talawana Track

The Talawana Track runs through the remote heart of the Gibson Desert, from Windy Corner to the Marble Bar Road. It’s one of the loneliest tracks I’ve driven, but also one of the most rewarding.
Constructed in the 1960s by Len Beadell’s team, this track offers a true test of self-reliance. With no services, minimal signage, and vast stretches of spinifex and salt lakes, you need to be completely self-sufficient.
Trip Tip:
Fuel, water, and navigation are critical. A satellite phone, StarLink or HF radio is non-negotiable. Travel with a second vehicle if you can.
Final Thoughts
Each of these desert adventures has challenged me, changed me, and deepened my love for Australia’s rugged heart. Whether it’s the towering dunes of the Simpson via the Madigan, the remoteness of the Nyangamarta Highway, or the sheer isolation of the Anne Beadell and Talawana Tracks, the magic of the desert keeps calling me back.
Australia’s deserts demand respect, they’re not to be rushed or taken lightly. But for those willing to prepare and take the plunge, they offer an experience like no other. So fill up your tank, drop those tyre pressures, and lose yourself in the silence of the sands.

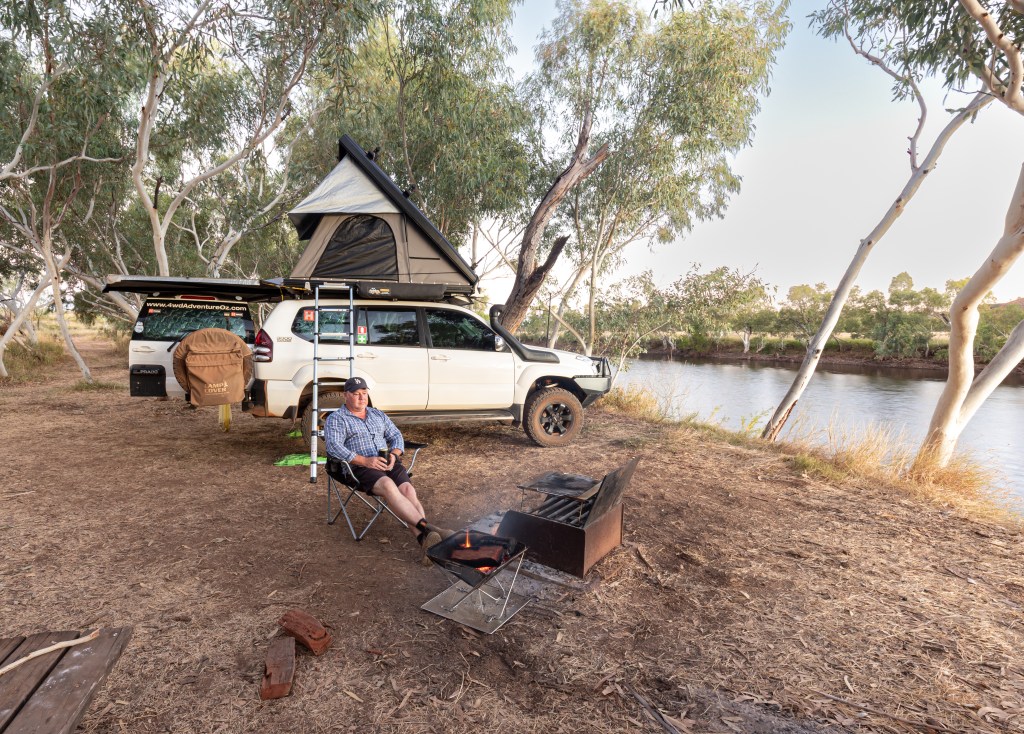
Camping in Australia is more than just pitching a tent – it’s a lifestyle, a rite of passage, and often the best way to truly experience the raw beauty of this vast, sunburnt country. From rugged coastlines to remote deserts and alpine hideaways, Australia offers a diverse range of camping styles to suit all travellers. Whether you’re chasing solitude or social vibes, simplicity or creature comforts, there’s a camping experience to match.
Here are the top five types of camping in Australia – and why you might want to give each a go.
1. Bush Camping – For the True Adventurer
Bush camping, or what many would call “off-grid” or “wild camping,” is the purest form of getting away from it all. No power, no showers, no marked sites – just you, your rig, and the Aussie wilderness.
Australia is blessed with countless national parks and public lands where bush camping is permitted (though always check for permits or fire bans). This type of camping offers serenity, star-filled skies, and a front-row seat to nature. It’s perfect for those who like to go remote, fish in solitude, or sit around a campfire without another soul for kilometres.
Best spots: Sandy Desert, High Country Victoria, Kimberley region, Simpson Desert
Gear tip: A reliable 4WD vehicle, water storage, a solar setup, and a long-handled shovel are essential.
Pros: Total freedom, low cost, few people
Cons: No amenities, higher risk if something goes wrong
2. Caravan Park Camping – Comfort Meets Community
If you enjoy meeting fellow travellers, love a hot shower after a dusty day, or need power for your appliances, caravan parks are a great choice. These managed facilities often offer grassy powered sites, communal BBQs, laundry, and sometimes even pools and playgrounds.
Caravan parks are ideal for families, grey nomads, or digital nomads looking to stay connected while exploring. They’re often located in prime locations near beaches, rivers, or tourist towns.
Best spots: Big4 parks along the east coast, Darwin FreeSpirit Resort, Discovery Parks in Margaret River
Gear tip: Bring your powered lead, water hose, and levelling blocks
Pros: Great facilities, safe environment, suitable for caravans and RVs
Cons: Can be noisy or crowded during peak times, booking ahead is often required
3. Station Stays – Aussie Hospitality on the Land
A station stay is a unique way to camp on working cattle or sheep properties, giving you an insight into life on the land. Many outback stations now offer campsites with basic facilities, providing the opportunity to experience activities such as cattle mustering, artesian bores, and outback hospitality around a communal campfire.
You’ll often find secluded campsites with plenty of space, and owners who are more than happy to share yarns about the region. It’s a more personal, grounded camping experience.
Best spots: Curtin Springs (NT), Trilby Station (NSW), Farina Station (SA), Home Valley Station (WA)
Gear tip: Carry cash or be ready for minimal phone coverage
Pros: Cultural insight, friendly hosts, stunning outback locations
Cons: Some roads can be rough, limited mobile reception
4. Beach Camping – Wake to the Sound of the Sea
Australia’s 25,000km of coastline offers some of the best beach camping in the world. Nothing beats waking to the sound of waves, feeling sand between your toes, and watching sunsets over the ocean from your camp chair.
Beach camping ranges from fully remote sites (like Sandy Cape on Fraser Island) to managed coastal campsites with toilets and showers. Some require 4WD access and sand driving skills, but the rewards are incredible – think fishing, snorkelling, and dolphin sightings straight from camp.
Best spots: K’Gari (QLD), Cape Range (WA), The Coorong (SA), Bruny Island (TAS)
Gear tip: Bring a sand mat, tyre deflator, and sturdy guy ropes for wind
Pros: Scenic locations, abundant wildlife, water activities
Cons: Windy weather, sand in everything, tides to be aware of
5. Glamping – Luxury in the Bush
Not everyone likes “roughing it,” and that’s where glamping comes in. Short for “glamorous camping,” glamping combines the joy of sleeping close to nature with hotel-style comforts. Think safari tents with real beds, hot showers, and even private decks and kitchenettes.
This style is ideal for those new to camping or for those seeking a romantic escape with a touch of indulgence. You can find glamping setups in vineyards, rainforests, deserts, and by the sea.
Best spots: Paperbark Camp (NSW), Longitude 131 (NT), Nightfall Wilderness Camp (QLD), Bay of Fires Bush Retreat (TAS)
Gear tip: Just bring your overnight bag – everything else is usually included
Pros: Comfortable, stylish, no setup or pack-down
Cons: Can be pricey, limited availability in peak seasons
⸻
Final Word
Australia offers a diverse range of camping styles, each with its own unique charm and appeal. Whether you’re chasing seclusion in the bush, family fun in a caravan park, rugged coastlines, or a taste of outback life, there’s something for every type of camper.
So, pack your swag, hitch up the van, or book that luxury tent, and hit the road to discover what camping in Australia is all about. The hardest part? Choosing where to go first.

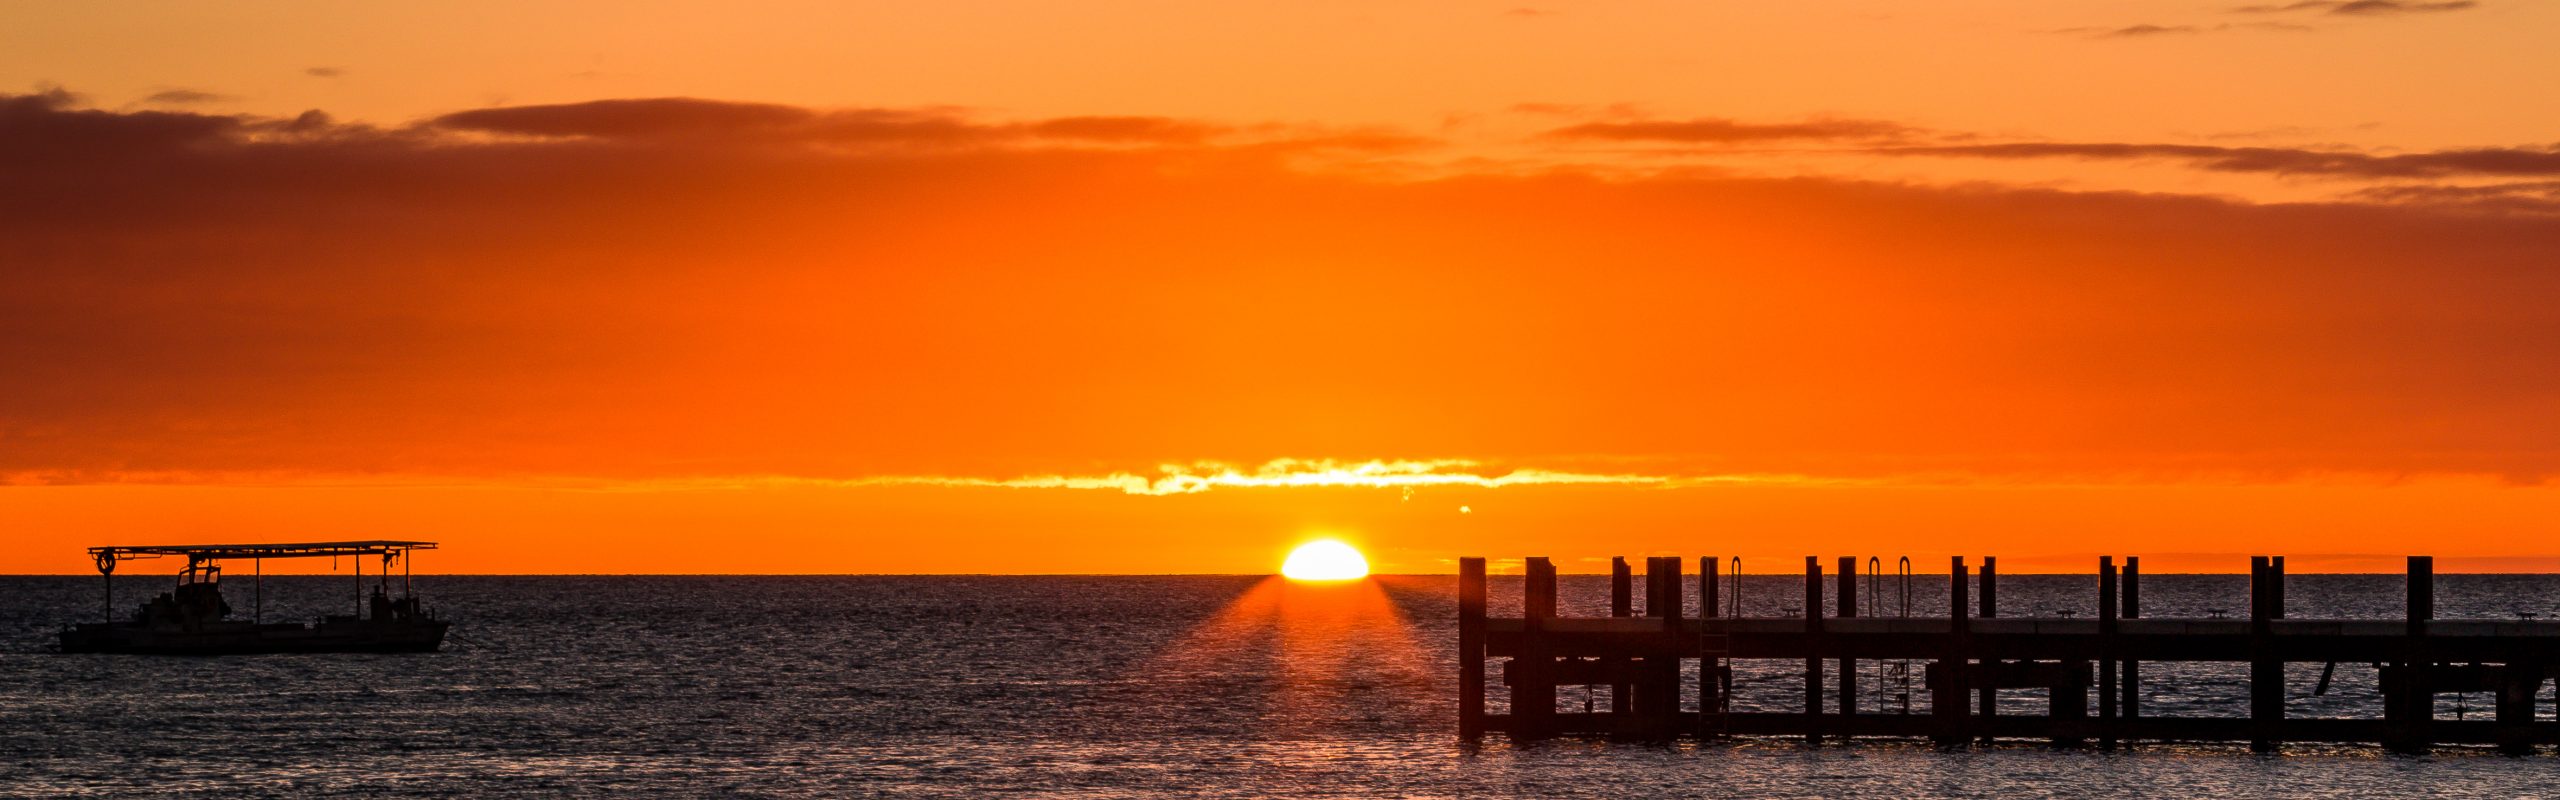
There’s something about the outback that stirs the soul. Maybe it’s the emptiness that somehow feels full. Maybe it’s the way the sun slips behind a distant escarpment, casting golden shadows across a red desert floor. Or maybe it’s that quiet moment around a crackling fire, when the stars come out and you realise there’s no place you’d rather be. Whatever it is, the outback grabs hold of you — and never really lets go.
Here are five reasons why Outback Australia travel is so irresistibly appealing.
1. The Remoteness – Nowhere Else to Be but Here
There’s a point you reach — sometimes an hour after leaving the bitumen behind, sometimes days — when you feel the modern world fade. The phone reception drops out. The last road sign blurs in your rear-view mirror. The silence rolls in like a warm tide, and all of a sudden, you’re in it. Really in it.
The remoteness of the outback is more than just distance. It’s an escape from the noise, the rush, the expectations. It’s where you remember how little you need to feel free. With every red-dusted track and every dry creek crossing, you’re reminded that life can be simpler — and richer — when you’re far away from everything.

And out here, remote doesn’t mean empty. It means vastness, discovery, and stories whispered on the wind. For anyone planning a remote Australian travel experience, this is what it’s all about — complete disconnection and absolute freedom.
2. The Beauty – Where Harsh Meets Sublime
You only have to watch the sun rise over the Simpson Desert or cast your eyes across the painted cliffs of the Breakaways to know that the outback holds a beauty all its own. It’s a place of contrasts — harsh and gentle, ancient and alive, burnt orange by day and washed with soft pastel hues by dusk.
There’s a rawness to the landscape that’s impossible to replicate. Jagged ranges slice through endless plains, hidden waterholes glisten in rocky gorges, and ghost gums stand in silent tribute to the land’s resilience. It’s a beauty that doesn’t ask to be admired. It demands it.

For photographers, nature lovers, and explorers alike, Outback Australia landscapes offer an ever-changing canvas of colour and light. It’s wild, it’s remote, and it’s unforgettable.
3. The Freedom – Go Where the Road Takes You
Freedom in the outback is measured not in kilometres but in choices. You choose when to stop, where to camp, and how far to go. There’s no schedule, no traffic lights, no waiting in line. Just you, your 4WD, and the road — or lack thereof.
Want to wake up beside a salt lake one night and under towering river gums the next? You can. Feel like heading off-track to explore an abandoned station or a lonely desert ruin? No one’s stopping you. Out here, the rules are simple: take only photos, leave only tyre tracks, and respect the land.
4WD adventures in Australia don’t get much better than this. With a reliable setup and a sense of adventure, the outback is your oyster. Whether you’re heading across the Plenty, exploring the Oodnadatta, or getting gritty on the Anne Beadell, the road less travelled becomes the road most rewarding.
4. The Serenity – Silence You Can Hear
City life is noisy. Constant. Even in the quietest suburbs, there’s always a hum — traffic, air-con units, someone’s lawnmower. But step into the outback and suddenly, silence has a sound. It’s the breeze rustling spinifex. The distant thump of a kangaroo bounding away. The crack of a twig underfoot. And sometimes, nothing at all.
This serenity is profound. It settles over you like dust, gently reminding you to breathe deeper, to listen more, to simply be. Long evenings by the campfire, with the Milky Way stretching above like a celestial ceiling, give you time to reflect and reconnect with yourself, with your travel companions, and with the country.

Camping in the outback is as much about peace as it is about place. No neighbours, no generators, just the flicker of the fire and the hush of the night.
5. The Adventure – The Spirit of the Unknown
Let’s be honest — we don’t travel the outback for comfort and convenience. We do it for the challenge, the thrill, the unknown. Whether it’s tackling the dunes of the Canning Stock Route, wading through water crossings on the Gibb, or coaxing your way through a washed-out track in the Gulf, the adventure is real — and it’s addictive.
But adventure doesn’t always mean hardship. Sometimes it’s finding an unmarked waterhole on the edge of the Tanami, stumbling across ancient rock art, or chatting with a local who’s lived here their whole life. It’s learning to read the country — watching the clouds, tracking the birds, understanding where water might lie after rain.

If off-grid travel in Australia is on your bucket list, the outback is your proving ground. It’s raw, rewarding and endlessly surprising.
Final Word
The appeal of Outback Australia can’t be captured in a single photograph or even a single journey. It’s a feeling that builds with every red track you follow and every campfire story you share. It’s about getting lost — not on a map, but in the experience. And once you’ve tasted that freedom, that beauty, that serenity and adventure, you’ll find yourself planning the next trip before the dust has settled on your tyres.
Because once the outback has you in its grip, it never really lets you go.

Depending on the environment and driving conditions, car brakes, especially on 4wd vehicles, can reach temperatures as high as 500 degrees Celsius. This extreme heat not only impacts braking performance but also reduces the durability of brake components, which can be particularly important when navigating rugged terrains or off-road conditions.

Manufacturers of high-quality braking components, such as Bendix, address these challenges through extensive research, testing programs, and by sourcing the best materials for their products. In 4wd vehicles, the demands on the braking system can be even greater due to frequent stops on steep descents or sudden halts while navigating obstacles.
One crucial factor in manufacturing parts like brake rotors is metallurgy — the science of metal composition — as it affects how heat dissipates. However, other non-metal brake parts can sometimes be overlooked. One material that is particularly susceptible to heat stress is rubber, which is used in components such as dust boots that protect the brake calliper slide pins and in brake piston seals. The heat generated during braking is especially damaging to rubber because brake parts undergo numerous heat cycles each time the vehicle is driven, particularly in off-road scenarios where braking can be more frequent and intense.
Therefore, it is essential to carefully inspect these rubber components as part of regular brake system maintenance, especially for 4wd vehicles that may face harsher conditions. Critically, rubber is also a primary material in the manufacturing of brake hoses, which are vital in 4wd braking systems, ensuring that hydraulic pressure from the brake pedal translates to effective braking force at the calliper. Consequently, brake hoses must be inspected regularly as part of brake system checks to ensure they can withstand demanding off-road conditions.

The Importance of Quality Brake Hoses for 4wd Vehicles.
When it comes to designing and manufacturing high-quality brake hoses, Bendix takes no chances. Bendix Brake Hoses are built to meet and often exceed SAE standards, FMVSS regulations, and other industry benchmarks, making them ideal for the rigorous needs of 4wd vehicles.
To ensure exceptional performance and durability, the hoses are constructed from PTFE (Teflon®) tubing, wrapped in woven stainless steel 304 braid, and finished with a Bendix blue Polyvinyl Chloride (PVC) protective layer. This protective layer safeguards the braid from dirt, dust, and grime that can accumulate during off-road adventures.
While steel braiding isn’t required under SAE standards, this additional feature enhances the brake pedal feel and prevents the hose from over-expanding under high braking pressures, which is especially crucial when driving on steep inclines or rough terrain. For improved performance, Bendix Brake Hoses also incorporate chrome-plated steel fittings with rubber over-mouldings that reduce coupling-to-hose fatigue. This design ensures durability in the tough conditions frequently encountered by 4wd vehicles, providing confidence and safety during every off-road journey.
For more information, visit the Bendix website http://www.bendix.com.au

