

On a recent adventure in South Australia’s Gawler Ranges, I realised that my Prado had been wearing this set of Kumho Road Venture MT51 tyres for over 50,000km. Installed in October 2019, these tyres have survived some of the toughest conditions in Australia and still have 10mm of tread remaining.
On close inspection there is no chipping, cuts, or tread damage on any of the tyres and the wear has been fantastic. I must stress that the tyres are rotated every 10,000km, including the two spares, which helps keep the wear even across all six tyres. I’m also a bit OCD when running tyre pressures to suit the terrain, which means lowering the PSI when I leave the blacktop and pumping them up again when returning to bitumen. My vehicle can be a little overloaded, but I compensate for that with my tyre pressure.

The first 5000km for the Kumho MT51 tyres were all bitumen and also included a bit of towing so I noticed the middle tread section wore rather quickly. COVID then struck so the Prado sat in the carport for a few months, which I’m sure the tyre rubber didn’t appreciate and I noticed more road noise on the first long road trip.

Once off the blacktop, the MT51s always performed as expected and even got me through trouble a couple of times, once in some deep, wet snow and in a deep, muddy water hole on Googs Track. The mud tyres were able to grip and extract the Prado out of these possible nasty situations.

If you take into account where I enjoy exploring and the different types of road surfaces that I encounter, you can see why I am so impressed with these Kumho Road Venture MT51 tyres. Whether it is a sandy desert track, a stony outback road, a rocky river crossing or a shaly mountain track I have 100% confidence that the tyres are going to get me home without any trouble. In fact, touch wood, I’ve yet to suffer a puncture but have had to use my type plugs on other people’s tyres on several occasions.

A thick sidewall prevents staking from sticks when tyre pressures are low when rock crawling or in deep sand. It is important to drop your tyre pressures when driving in sand and I’ve even aired down the Kumho MT51 tyres to 10PSI in extreme situations. Generally, I like to run the front tyres at 16PSI and the rear tyres at 18PSI on sandy desert tracks.


When exploring the Victorian High Country or on a shaly outback climb, my tyre pressures run between 20 – 22PSI for the front tyres and 24 – 28PSI for the rear tyres, depending on the conditions. I find that this gives me a good footprint, reduces wheel slippage and improves the ride comfort. The side biters help protect the sidewall from damage caused by rocks and stones.

My previous set of Kumho Road Venture MT51 tyres travelled over 85,000km, so I will be very happy if these ones last that long.
Living the Dream, Sharing the Experience

Does your winch hook flop in the breeze? Mine did and I finally found something that only takes five minutes to solve the problem.
Having asked Google if there was a way to fix my problem, I was quickly directed to the A247 website. This family-owned and operated outdoor adventure online store has everything you need when it comes to top-quality gear and it’s with pride they say, “We provide the gear, you provide the adventure”.
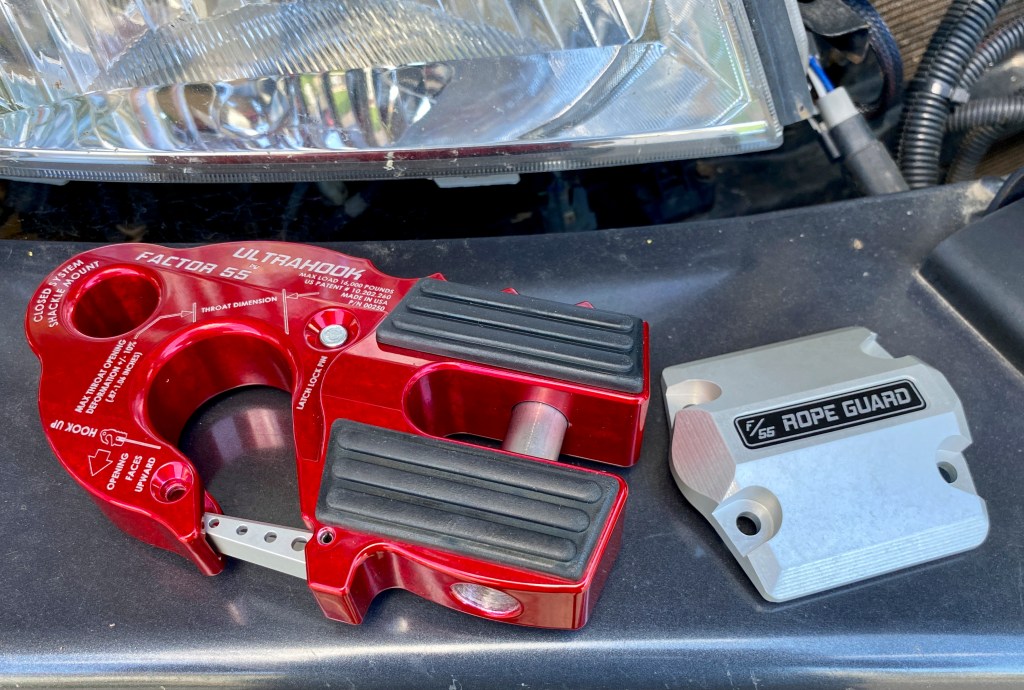
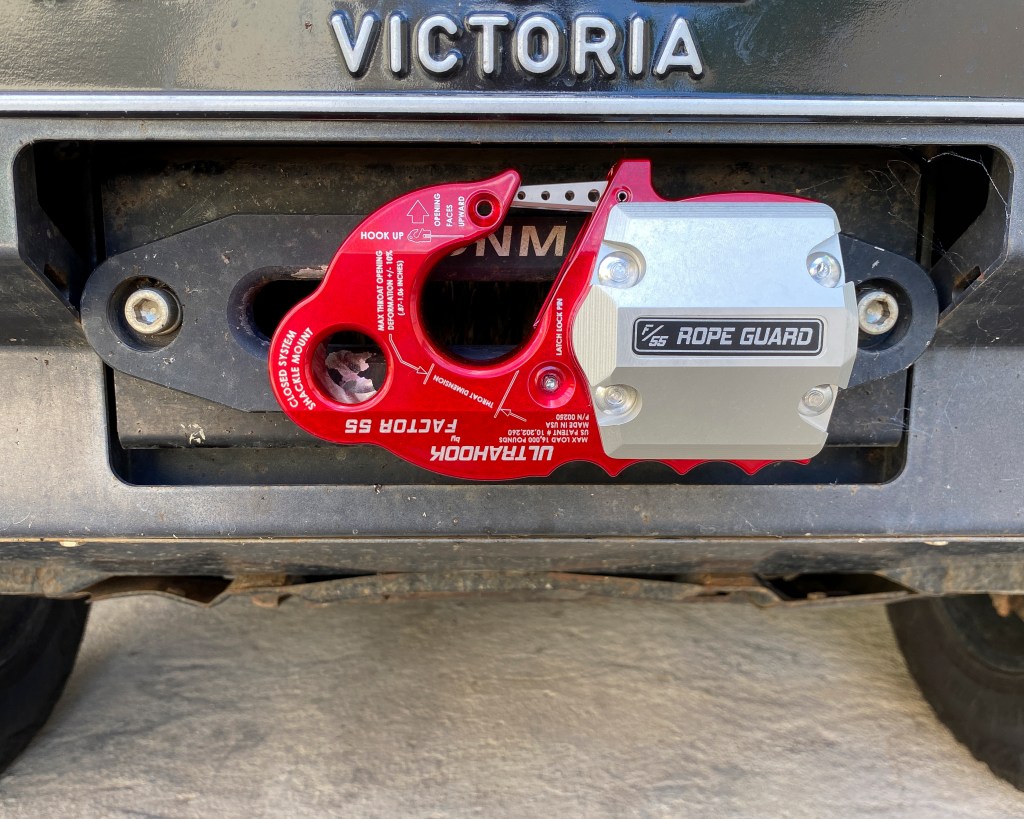
Having made my way to the Offroad Recovery page, I stumbled across the Factor 55 UltraHook. It wasn’t just the flashy red colouring that caught my eye, it was the style of the hook itself, that offers not just a lockable winch hook, but a shackle pin mount as well. Sure, I could have chosen the grey option, but there’s something about that red that made the choice easy. After adding it to my cart, I realised I’d just saved $10 as A247 is currently having a sale.
I was starting to drool as I explored the rest of the recovery gear A247 had to offer, all the latest gear like soft shackles, kinetic recovery ropes and winch extension ropes, it is time to modernise and lighten up my recovery kit.
It was then I cast my eyes upon the Factor 55 UltrHook Rope Guard. This little add on connects to the UltraHook and protects the winch rope cable eye, such a brilliant idea. This was added to my cart and I soon had confirmation of my order hitting my inbox.
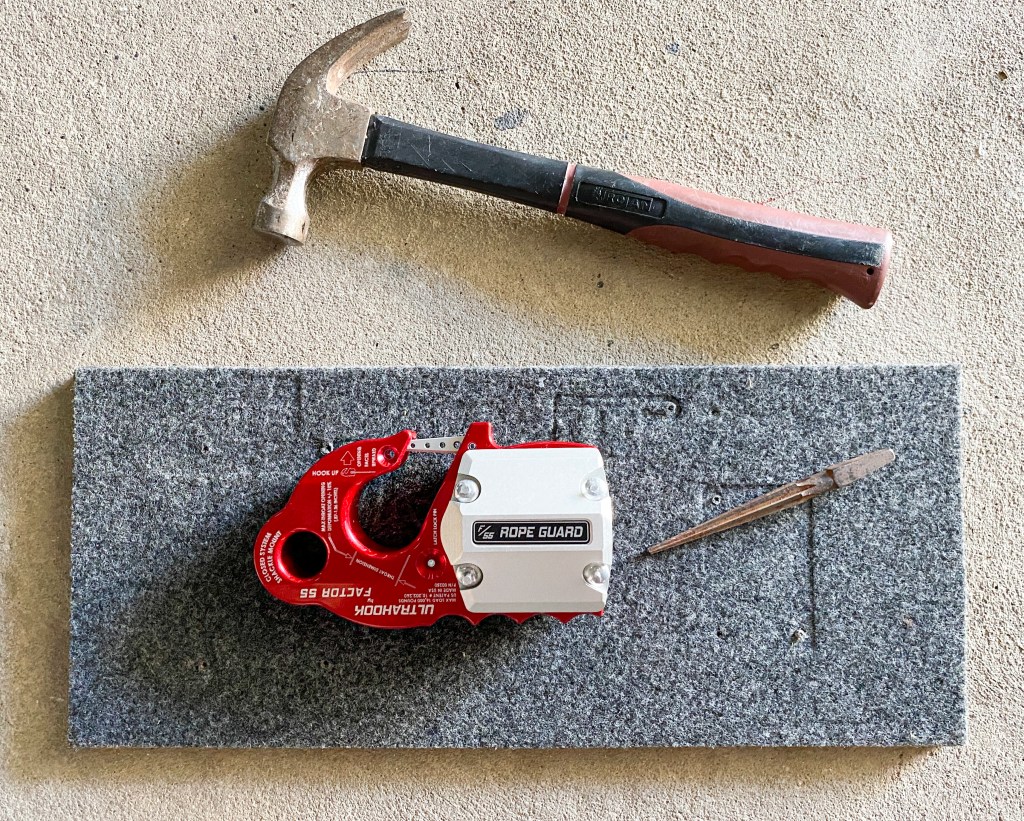
A few days later the gear arrived in my letterbox and I couldn’t wait to get stuck into replacing my floppy winch hook. It did take a bit of time to knock the pin out of the winch hook, a nail punch and vice made it a little easier.
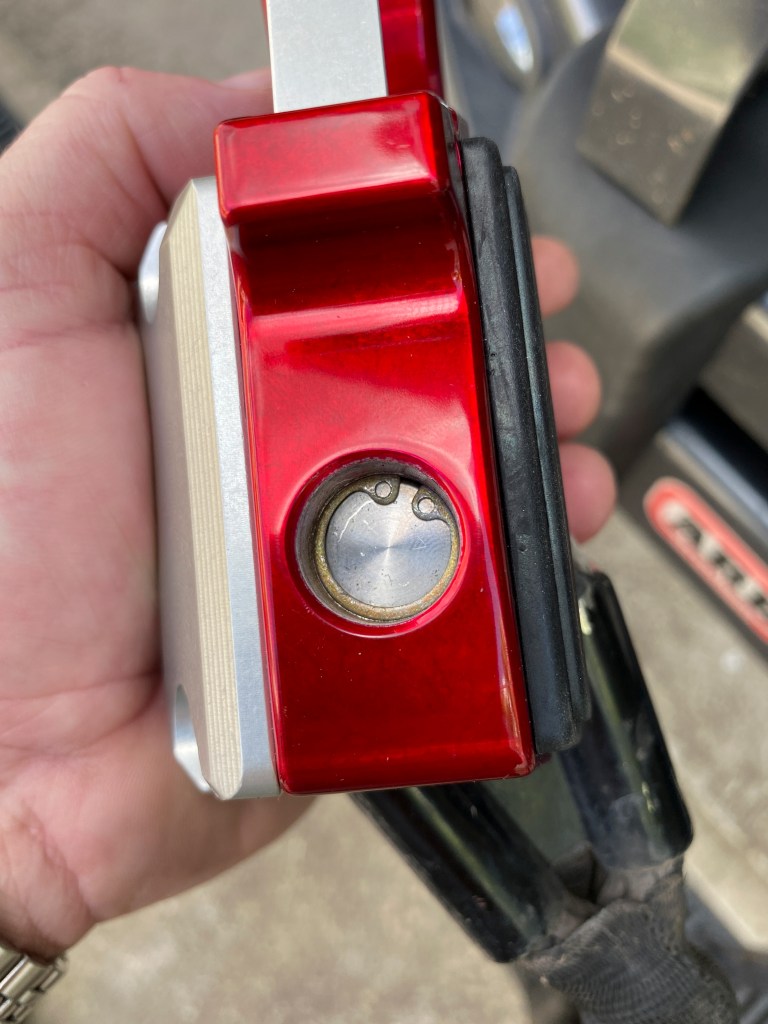
Before installing the UltraHook, I removed two of the integrated EPDM rubber pads from the forward-facing side, having already worked out which way I wanted the UltraHook to sit. Next job was to fit the rope guard into place before hammering in four drive rivets using a 5mm nail punch.
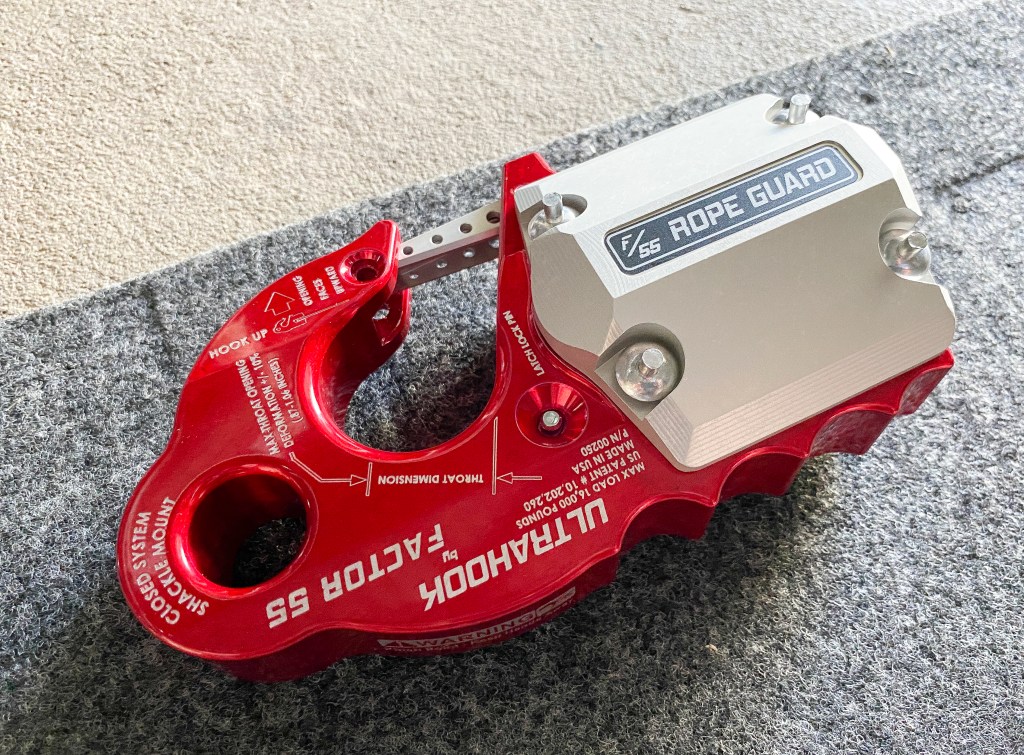
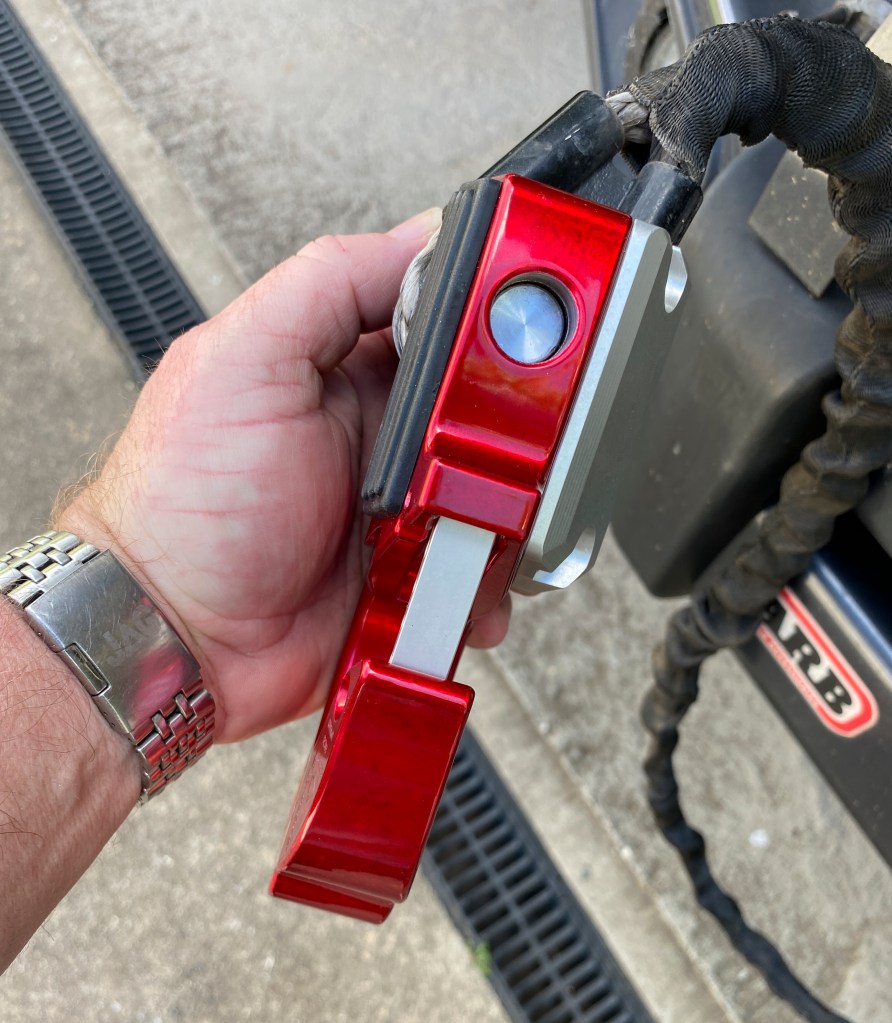
Then it was just a case of placing the winch rope cable eye into the UltraHook, feeding the shear pin through the eye and inserting the snap ring. Circlip pliers come in handy here, but you can use a screwdriver or scribe if you don’t have them, just ensure the snap ring clicks into place. The last task is to use the winch to pull the cable back in and allow the UltraHook to stow rattle free against the fairlead, no more flopping about.

Some Specs for the Factor 55 UltraHook:
- Made in the USA using military specification hard anodising
- The shear pin is 5/8” diameter 6AI-4V grade V titanium
- Max rated load of 16,000 pounds
- Ultimate strength of the hook throat opening is 31,000 pounds
- Ultimate strength of the shackle pin mount is 48,000 pounds
- Weight 907 grams

Lithium revolutionised the world of batteries, but do they suit the 4WD market?
Surely, I’m not alone when it comes to overlanders having issues with their 12-volt systems. From memory, I’ve had to purchase more than six batteries over the past four years. With the expense averaging out to over $250 per battery, it was unsustainable. I even swore never to buy a particular brand ever again (four of the batteries where that brand), but unfortunately, when the last deep cycle battery perished on the Binns Track, it was all I could get in Kununurra.
On my return home, I began researching lithium as an option for powering my auxiliary items (fridge, inverter, camp lights, air compressor etc). It seemed that the more I read, the more confused I became, there were so many different brands that all sounded different and prices from ridiculously cheap to frighteningly expensive. I then met the team from AMPTRON in Western Australia and suddenly had all my questions answered, this is what I learnt.
1. What does LiFePO4 mean?
There are several types of lithium-ion batteries. The main difference between them is their cathode chemistry. LiFePO4 stands for Lithium Iron Phosphate which is the chemistry of the cathode of this type of Lithium battery, and it is these cathodes that help in making Lithium batteries cheaper and safer than they once were, being low cost, low toxicity, well-defined performance and long-term stability. LiFePO4 is also highly resilient during oxygen loss which is what caused exothermic reactions, and fires, in other Lithium cells. This is the main type of Lithium-ion battery used in the 4WD and RV market.
2. Why are lithium batteries so light?
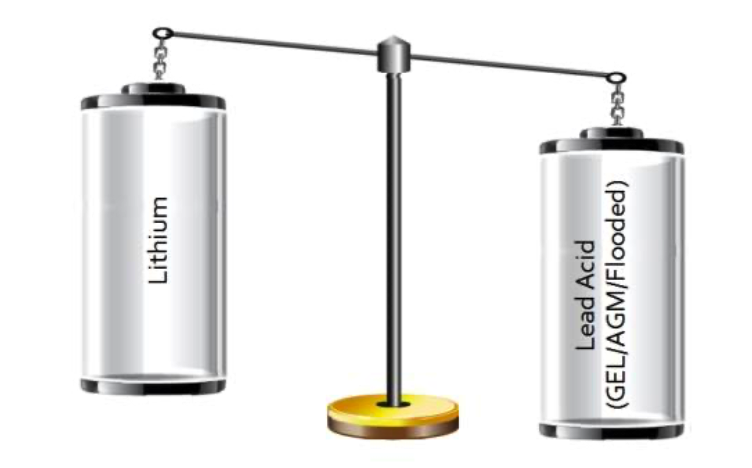
Lithium is one of the lightest elements, with hydrogen and helium the only two that are lighter, and they are gases. LiFePO4 batteries made up of lithium ions and carbon, making them extremely lightweight, whereas a wet cell battery is full of lead alloy or fibreglass plates and sulfuric acid.
3. What is a BMS?
 The BMS is the internal Battery Management System that protects and manages the Lithium battery cells. It limits the peak voltage of each cell during charging and preventing the cell voltage from dropping too low on discharge. It also monitors the temperature, charge and discharge rates of the battery, preventing extremes during charging and discharging. This means your LiFePO4 Lithium battery is unlikely to become unstable or unsafe, thanks to these protective measures. Even if punctured, a LiFePO4 battery won’t catch fire.
4. Can I use a lithium battery as my starter battery?

LiFePO4 batteries are sensitive to heat, so placing them in your engine bay may cause the battery to operate under excessively hot conditions which could significantly decrease the battery life. Also, most LiFePO4 Lithium batteries are designed as deep cycle batteries to deliver steady power for a long period, therefore the peak current these batteries are designed to deliver is insufficient for a cranking battery. Further, the charge profile of many modern alternators is not ideal to maintain LiFePO4 batteries. I’ve been advised AMPTRON are in the process of developing a Lithium battery with high heat tolerance and sufficient CCA abilities that can operate within the engine bay and can also be used as a deep cycle battery.
5. Can I use any type of charger on a lithium battery?


The method used to charge a Lithium battery is based on a CV/CC (constant voltage/constant current) charge algorithm. LiFePO4 batteries usually require a slightly higher voltage to fully recharge compared to Lead Acid batteries, but there is no float or trickle charge stage since that is detrimental to the battery life.
Many lead-acid chargers have an equalization mode, which supplies a deliberate over-voltage charge for a short period to combat sulphation and acid stratification. Applying an equalization charge to a lithium battery may damage the cells.
The other function that lead-acid chargers have is a “return to bulk” voltage. Once the charger is in float, it will maintain the battery at a pre-set voltage. When the battery discharges under load, the voltage will reduce. Once the voltage reaches the “return to bulk” voltage, the charger will start a new charge cycle and start re-charging the battery. The problem is Lithium batteries maintain a higher voltage than lead-acid batteries while discharging, and by the time it reaches the “return to bulk” voltage the Lithium battery is already very low.
You can use a lead-acid charger on a Lithium battery, however, you mustn’t allow an “equalisation” stage. A lead-acid charger that can be set to charge no higher than 14.6v (usually the AGM setting is the best option) can be used for regular charging and then must be disconnected after the battery is fully charged. Do not leave the lead-acid charger connected to maintain or store the battery.
Ultimately, using a battery charger with a specific Lithium charge algorithm is the best option for maximum performance and lifespan of any lithium battery. One thing you’ll notice is the speed at which a LiFePO4 battery recharges, up half the time compared to a lead-acid battery.
6. Are all lithium batteries equal?


The simple answer is no, and this is why. Many lithium LiFePO4 battery manufacturers use smaller and cheaper cylindrical cells that deliver reduced discharge capacity and short life expectancy. The tabs on these smaller cells are often welded together which is susceptible to forming micro-cracks that diminish the performance and lifespan of the battery.
Manufacturers, like AMPTRON, use high-quality prismatic cell design with high discharge ratings and exceptional life cycle performance. Connecting cells by bolting them together via threaded terminals provide a stronger and vibration resistant battery.
It’s these differences in construction that also create so a range in the pricing of lithium batteries.
7. When does a lithium battery stop providing power?
Under load, a LiFePO4 battery discharges while maintaining a high voltage until it reaches about 95% Depth of Discharge. The internal BMS will cut the power supply once the battery voltage drops below its low voltage cut-off, which for a 12V battery will typically be near 10V.
8. What is the cost comparison between LiFePO4 and Lead Acid batteries?
 While the initial layout cost for a lithium battery is at least twice that of a deep cycle lead-acid battery the expected life span of the lithium battery is more than four times longer than that of a lead-acid battery. A lithium battery will also provide as much as twice the usable energy of a deep cycle lead-acid battery of the same rated capacity because you can use a greater Depth of Discharge (DoD). For a quality LiFePO4 battery, you’ll realise more than 2000 cycles at regular 100% DoD and up to 5000 cycles at less than 80% DoD, compared to an AGM battery may be having a life of 400 to 800 cycles at 50% DoD. You can expect to buy at least three lead-acid batteries to one AMPTRON LiFePO4 battery that has a typical lifespan of 7-15 years.
Who is AMPTRON?

AMPTRON® is an Australian owned and operated company supplying high-performance energy storage, generation and monitoring solutions used in Recreational, Marine, Commercial, Industrial and Mining applications such as Lithium batteries, chargers, power monitors, solar panels and portable power packs including off-grid installations. Its founders have deep roots in the Electrical Manufacturing and Industrial Automation industries, but also share a love of the outdoors and like to “get out there”. AMPTRON is focussed on providing quality products and solutions at competitive prices combined with great customer service. AMPTRON have supplied me with a lithium battery to use in my 4WD.
For more information visit the team at AMPTRON

Having decided it was time to check oil levels, it was a challenge to open the bonnet of my Prado as it suddenly weighed heavily. One of the gas struts had decided to fail, hydraulic fluid leaking down the shaft. I was impressed that it had lasted so long, especially having been in the midst of my engine bay fire, the scars still evident on the hardened plastic cover. Thankfully, changing the gas struts that open and hold up your bonnet is very simple, just remember that if you have to replace one, it’s better to replace both so they have the same pressure and age.
First thing I did was jump online and check out what was available for my 14-year-old vehicle. The usual automotive stores sold suitable replacements, but for my vehicle, individually not pairs. Then Google led me to Gas Struts Guys, an Australian owned and operated business that specialises in supplying automotive and universal gas struts. It was easy to enter my vehicle details and find the right kit to suit, and it came as a pair. When the kit was delivered, here is what I did to replace my old gas struts with new ones.
1. Remove the old struts:


This was just a matter of unscrewing the mounting points on the bonnet and body panel using a 12mm spanner and removing the strut with the mounting point attached. I used a broom handle to hold the bonnet up, but it is safer to have someone hold the bonnet for you, just in case. I replaced the faulty strut first so that the good strut could help hold the bonnet up.
2. Install the mounting points:


The kit comes with four mounting points, easily screwed into the existing holes and tightened with a 12mm spanner.
3. Attach the new struts:


Once the mounting points where installed, I used a flat blade screwdriver to release the clip and then pressed the strut onto each mounting point, before closing the clip. Having viewed videos since, releasing the clip may not be necessary for installation, only for removal of the strut. Having replaced the failed strut, I then replaced the second strut just as easily. The entire job took less than 10 minutes and was one of the easiest maintenance jobs ever performed.
So, if the gas struts that support your bonnet give up the ghost, it is simple and easy to replace them. The replacement gas struts cost me $39.95 with free postage for the pair from www.gasstrutguys.com.au.

